There are multiple techniques for editing Instagram pictures, thanks to the emergence of several third-party apps and programs. While some individuals apply beautiful and attractive filters or vibrant light leaks to their pictures as layers, many professional photographers are putting white frames for their pictures to offer a unique touch. To make it simple for users to try out this look, let us read over the many methods to add white borders to Instagram pictures in this post.
How does Instagram White Border make an Impact?
Instagram’s white border serves to ensure that the user’s audience sees the complete post. Users have control over how they view content by using Instagram’s white frame feature. Instagram photo borders provide them with a professional appearance since they prevent viewers from having to tap on thumbnails to view the cropped version. The phrase “how to apply borders on Instagram pictures” is commonly typed into search engines.
Instagram photo borders may be easily added, and this post will help users better grasp how to do so. Let us look at border-adding techniques, the best third-party programs, and border-adding considerations!
Methods of Adding White Frames for Instagram Photos
With a few quick and simple techniques, users may make their content stand out when adding the white frame for Insta pictures. The most well-liked and simple stages to finish the process are the five methods described here.
Method 1: Adding a White Frame around the Picture with Photoshop
One top app that can easily add white frames to Insta pictures, is Photoshop. Only one frame type is supported by the Instagram editor. To create uneven borderlines to vertical or horizontal pics, users require unique technologies.
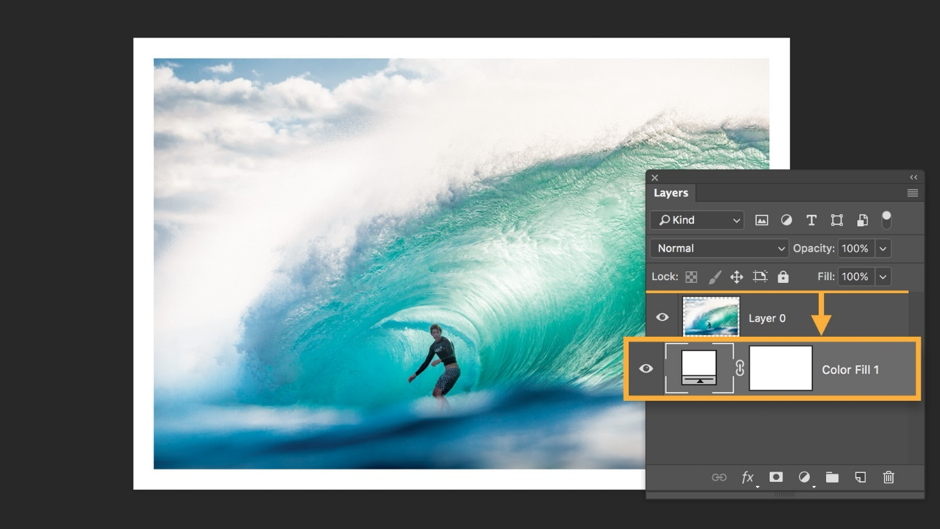
The photo-editing industry is led by Photoshop. Users can change many elements of the Instagram image like drawing a pattern, adding a white frame, or reshaping it. Photoshop’s Clipping Mask function can be used as a smart approach for creating borders.
- Create the frame first, then add a rectangle or a square to mark the precise location of the photo.
- Include the image as a second seam in the design.
- Right-click the image layer while the photo manner above is reshaping the image, then select Create Clipping Mask.
- The picture will be encased in the shape users gave it once they’ve finished doing this. With the Move tool, users can reposition the image inside the shape’s perimeter.
- Make use of the Rectangle Marquee tool, right-click the image, and select Free Transform to resize. Grab the Shift key while using the mouse to grab one of the image’s edges and pull to enlarge the image.
Method 2: How to give a Border on Instagram Picture through Instagram?
With the native Instagram, the app functionality is the easiest approach to creating white frames for Instagram. Users will notice that images are shown as squares surrounded by a thin white border if they take a quick look at the profile page. Users could swoon over this, but they can make their picture’s white borders more appealing.
To add a more substantial white border to the edge of Insta pictures, follow these steps:
- To upload a new photo, select the Plus symbol from the Instagram app. Simply choose the image to add to the gallery.
- In the right corner (top), click on Next.
- At this point, the filter starts to function. Choose the Instagram filter for the picture. Users can still briefly select a filter even if they decide to leave a photo un-filtered.
- Select the filter users recommended twice.
- Users should see a slider along with a square right next to it. Use the slider to choose the filter’s opacity. Simply move the slider to the left to keep the previous appearance.
- To add a white border to the photo, click on the square.
- Now, click on ‘Done’ and then ‘Next’.
- After adding a caption, choose Share. The photo will be displayed in the gallery within a white frame.
Other Options for Adding White Frames for Instagram
Method 3: Adding a White Frame around the Photo with a Preview
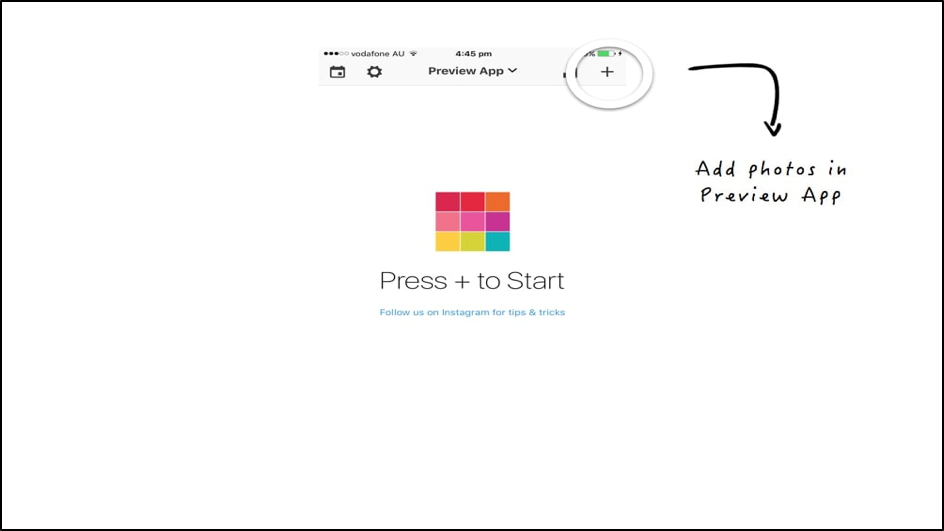
An Instagram editing and planning tool with a range of white borders users can create to acquire a custom theme is available in the Preview app. Here’s how to use the Instagram app to create white frames:
- Open the Preview app on the smartphone.
- Click on the ‘+’ icon in the right corner (top) to add a picture.
- Now, from the Library menu, go to ‘Camera Roll’ and choose the file to upload.
- Click on the shutter symbol at the screen’s foot.
- Click on the editing symbol, the ‘three horizontal frames’ with tabs that intersect them.
- Move to the Frames.
- Choose the border to apply on the picture in a selection of up to 30 lines to compare.
- Tap on Apply, Done, and tap Save.
Method 4: Adding a White Frame around the Picture with Squareready
Whatever the initial proportions, Squareready supports white, colored, and patterned frames. With the help of the tool, users can move their photographs inside the frame in an off-center manner to produce a distinctive appearance. Use Squareready to make white Instagram frames by following these steps:
- From the phone, download and open the application.
- In the center of the screen, tap the square face.
- Onscreen, the Camera Roll will appear. Choose the image to which a white border should be added.
- Choose between a landscape and a portrait cropping option. This implies that users can make borders without having to clip a square.
- Click on the border icon.
- Click on the colored orb, down left to predetermine the tone.
- Next, tap on the green check indicator, which will allow users to save their photo and post it on Instagram.
Method 5: Adding a White Border around the Picture with VSCO
VSCO is a well-liked photo-editing program that can be downloaded for free from the mobile App Store. Users can use a variety of editing features and filters without paying anything. This application allows users to choose from a variety of color borders for their pictures. Take the following steps:
- Open the VSCO on the smartphone.
- Click on the ‘+’ icon in the right corner (top) of the screen.
- Move to the photo to be used.
- Click on Import on the screen’s bottom and select the picture.
- Click on the Edit icon in the left corner (down) of the screen.
- Hold the Edit icon once again.
- Scroll to the right until the Borders icon is seen, now click on it.
- Select white color.
- Users can customize the border size using the slider.
- Click on Next in the right corner of the screen and hit ‘Save’.
Method 6: Adding a White Frame around the Picture with Instfit
Another simple and cost-free third-party software to test is Instfit. It can assist users in uploading full-size pictures to Instagram with a white border. Collages and overlays are only two of the intriguing features offered. For adding a white frame with Instfit, follow these steps:
- Open the ‘Instfit app’.
- Click the image tab in the left corner (top) of the screen.
- Click on Photo.
- Head to the photo to be used.
- Now drag the picture to modify its place or enlarge or make it smaller using two fingers.
- Click on the arrow button in the right corner (top) of the screen.
Note: The Instfit app adds a watermark to every image users alter, but users can easily get rid of it by following their page on Instagram.
Wrap Up:
All of the aforementioned software support all common formats and have a wide range of features and functions. A catchy and alluring border may be added to any photo with just a click, and they are also incredibly comprehensive and easy to use. Users can increase their creativity by using the borders offered by these programs, among other things!


