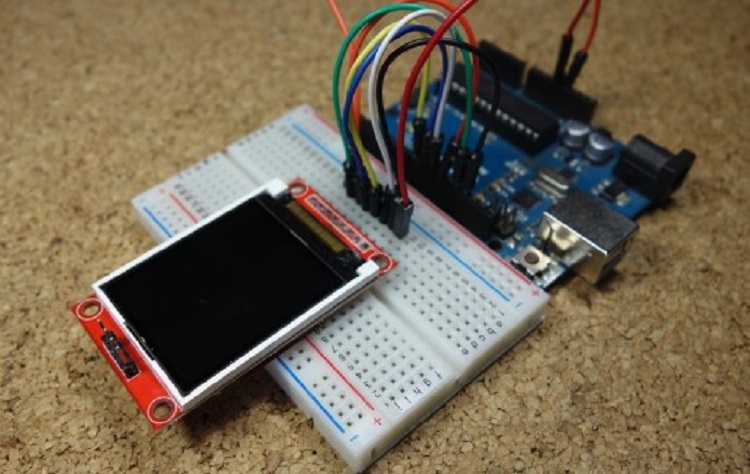
The world is changing and new technologies are being introduced on daily basis. If you are not conversant with every bit of this technology, then you may be left behind with no time. Today, the world is celebrating the introduction of TFT LCD Displays which makes it easy to save space, save energy and get better images on your module.
Most of the people are not yet aware of some of the commands, the professional designs and the tactics of TFT LCD Displays. To make it easy for you and others to understand every bit of these new display technologies, we have compiled all the data in this brief. Here, we will explain to you how to use TFT LCDs and also explain other information including their technic and all the commands in the professional design.
What is a TFT LCD DISPLAY?
This is a variant in LCD that is slightly improved from the normal LCD displays. It uses thin-film transistor technology to make sure the sharpness and the quality of images if at par. It also improves other qualities including addressability and contrast. In simple terms TFT LCD display is an active matrix LCD. It is slightly different from the passive matrix LCDs or simple direct driven LCDs with a few segments.
Presenting ideas on Displays
This is a very common and a useful thing that should be facilitated between the system and the user. To do this, there are several things that can be done. The interface could be created by displaying data, a menu and it also made easy to use. In this case, a beautiful design is also very imperative.
To achive this, there are several components that should be involved including LEDs, 7-segments, full color TFT LCDs and Character and Graphic displays.
Depending on the amount of data that you wants to display, you can choose any of the components. This may also heavily depend on the processor capacity and the type of user interaction.
Which size?
One mistake that people make is assuming that bigger displays are better. The fact is that the best of all is not the size but the resolution. This means that if you want to choose a bigger size display, then you should go for the one with a higher resolution.
Though, you have to bear up with reduced processing speed. It also needs more space and at the same time consumes more energy. This call for more time to check for other features including the speed of motion, details of color and size of text, image and numbers and eventually the resolution.
The controller
After now you have choose a good display, its time to choose the right controller. This comes into play if you want to display characters, numbers, static images and tests. The speed of the TFT LCD display you choose should as well be a good thing but it’s not a very important aspect. In this case, you can choose the Atmega 328 Arduino boards which includes the Arduino UNO because they are better options.
Drivers and Libraries
A driver in most cases is a semiconductor integrated circuit which is meant to provide an interface function between a microcontroller, ASIC and microprocessor. This means it’s a very necessary thing before you start enjoying quality displays. The display driver is aimed at accepting commands and data.
Today, manufacturers use different drivers in their specific products. There are some of them that are more popular than others and several others that are uncommon. If you are one of those people that want to run the display easily, then you should use Arduino LCDs libraries. You can actually add them to your code. If you don’t choose this, then it may be very difficult to run the display.
As a matter of fact, there are several free libraries that you can find out there. Though, the most important thing about the libraries is if they are compatible or not. If they are not compatible with the LCDs driver, you will have a hard time.
Code
After adding the Library, you will be forced to upload the code. If you don’t know how to do this, then I have highlighted the key steps below.
You can visit Arduino and go to the Main/software and eventually download the software and install. After that, you should run the Arduino IDE and clear the text editor. Now copy the following code in the text editor.
What follows is to navigate the sketch and include the libraries you choose. To add the libraries, now click the add ZIP library.
Choose the board in tools and boards and eventually select the Arduino Board and later connect it to your PC. Now you have to set the COM port in tools and port. Press the Upload button and wait.
