An Overview – Mac’s Night Shift
Our body is a flawlessly coordinated machine. The human brain’s circadian clock runs continuously in the background, controls the 24-hour cyclical rhythms, and makes up the body. Apple and other computer manufacturers assert that research has established how our circadian rhythms can be impacted by exposure to intense blue light from computer screens.
 Our brain’s internal clock is in charge of several processes, including the periodic cycles between drowsiness and alertness. Bright blue light can simply mess up the human wake/sleep cycle and make it difficult to fall asleep since it has been demonstrated to influence the circadian clock.
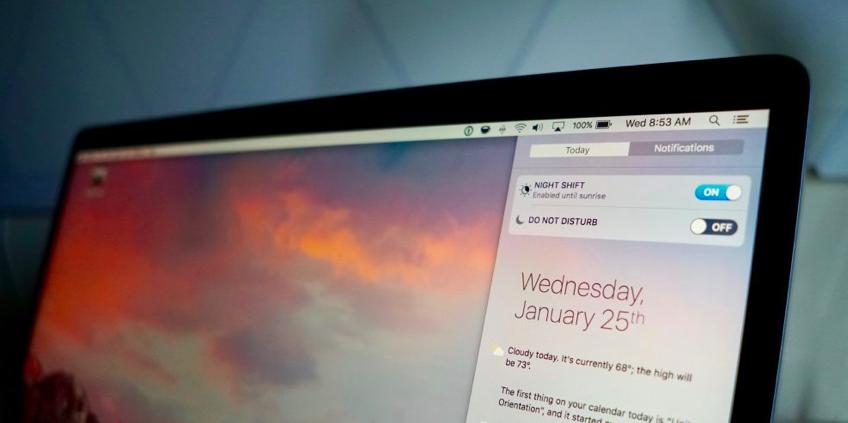
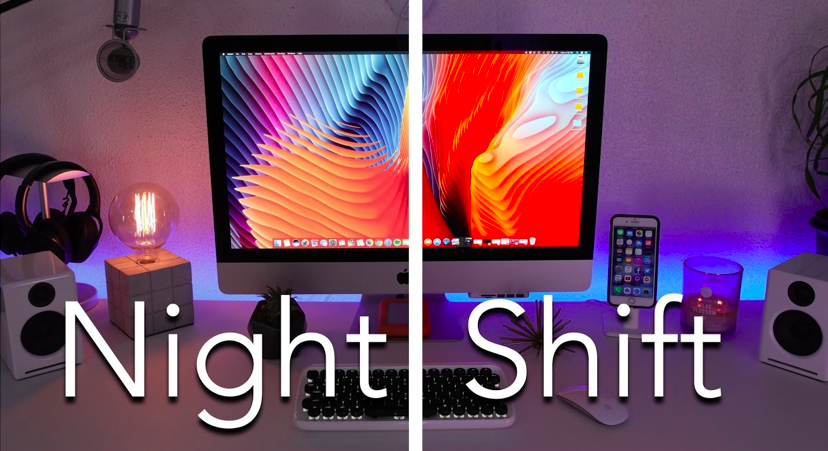
To aid customers in getting a good night’s sleep, Apple developed ‘Night Shift’. When used, the feature modifies the display’s color temperature to lessen the blue light’s amount that is emitted, which can disrupt sleep and strain the eyes. As the sun sets, Night Shift automatically changes the color temperature from chilly to warmer based on the location and time of the Mac, simulating changes in outdoor lighting.
The Popularity of Night Shift
The market has been overrun with Night Shift apps in recent years. Yet, none of them are listed in the Apple App Store since they violate Apple’s sandbox guidelines. Hence, use caution when attempting to download third-party Mac blue light filters; instead, stick with the official Apple providing, which is rather straightforward and efficient. Now that many well-known web applications, including Google Chrome, YouTube, and Reddit provide versions of the Dark Mode, everyone should use them at night.
Here, we’ll go over how the night shift feature on Macs and MacBooks operates, how to manage the night shift, how to set up a new wallpaper that is compatible with both night mode and dark mode, and how to switch on the dark mode on certain favorite applications.
Mac Night Shift System – Requirements
Night Shift runs on MacBooks and Mac desktops made after 2012 that are running operating systems like macOS Sierra 10.12.4 or the recent ones and is dependent on Apple’s Metal graphics framework.
It should be noted that it functions even when Mac Studio, Mac Mini, and Mac Pro are linked to Apple Studio Display or other external displays.
#1. Organize and switch on the ‘Night Shift’ from the device Settings
#2. Tap the Apple icon and choose System Settings.
#3. Select Displays from the sidebar on the left.
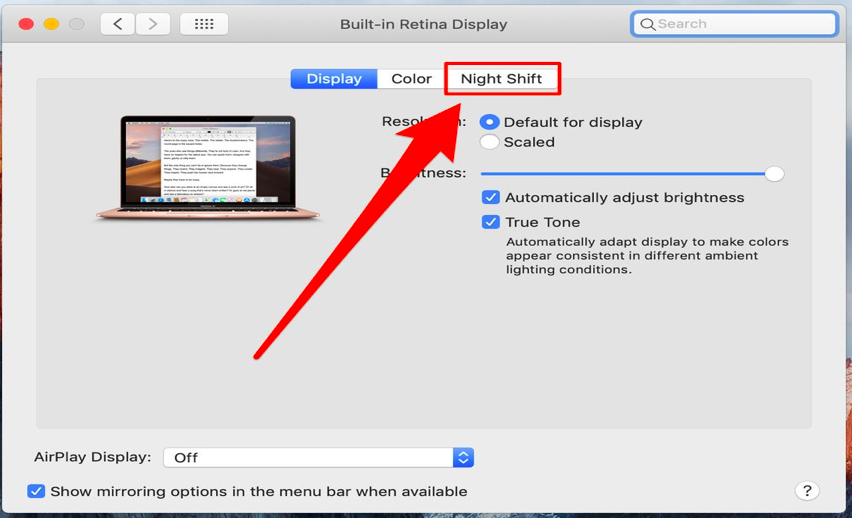
#4. Now, tap on Night Shift.
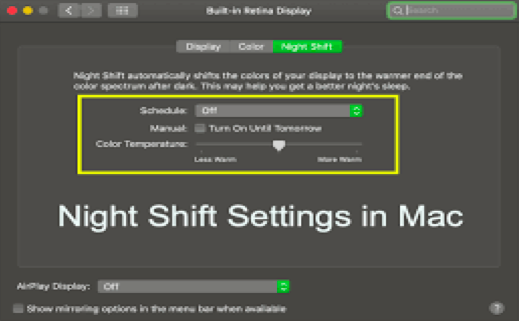
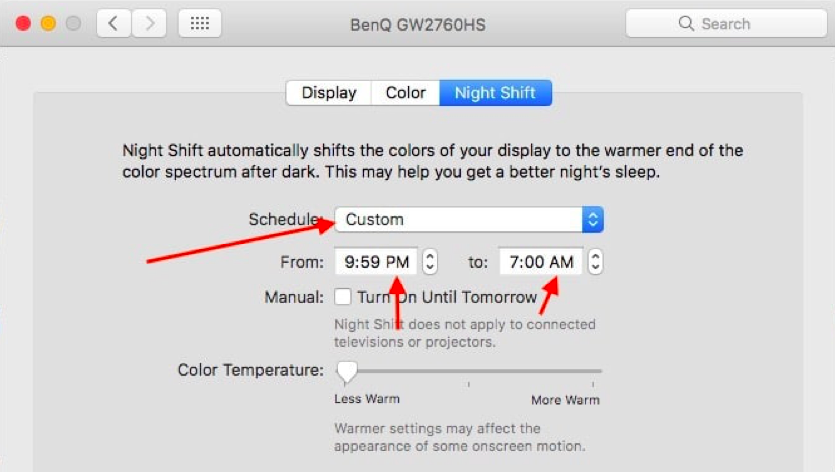
From here, turn on till tomorrow: Turn on to use the ‘Night Shift’ option till the next day morning.
Color Temperature: Users can change Night Shift’s intensity with this slider. It is set to be in the middle by default, but users can adjust it to be warmer (more orange) or less warm.
Schedule: Choose Sunrise to Sunset from the drop-down menu by clicking on it. Users can also choose Custom and specify their preferred times as an alternative.
#5. Now, click Done.
How to use the scheduled Night Shift, properly?
By selecting this option, the Mac will ask users to use their location to calculate when it is a night for them. They must enable Location Services and, if not done so already, set the appropriate time zone to use this option.
On a Mac, turn on Location Services by going to Device Settings > Privacy and Security, then Location Services and ensure it is selected. Following that, enable the switches for Configuring time zone and System customization by clicking Details beside System Services.
Read More: The Top Benefits of Apple Smart Watches and Reasons to Buy Them
Turning on the Night Shift on a Mac
Below is the process of activating the night shift option, and how to switch off Mac Blue Light:
- On the Mac device, choose the Apple logo on the left on the menu (top)
- Choose “System Preferences” from the drop-down list
- Choose “Displays”
- Choose the “Night Shift” panel
The timetable for the night shift can be changed here. Users can toggle it completely off, set it to “Sunset to Sunrise,” which instructs the Mac device to turn it on and off depending on the day’s time and when it detects sunrise and sunset or can make a customized plan. For individuals who have darker spaces, the latter is a fantastic choice.
Users may select the color temperature they prefer with Apple as well. When using the night shift for the first time, it’s a good idea to fiddle with this setting to customize it to one’s specific tastes.
Using Auto Night Shift Mode Option on MacBook
If users are working remotely in the evening or early morning, one of the nicest settings they can do is enable their MacBook to automatically night shift. Additionally, setting it up is quite easy.
All users can do is choose “Schedule” from the Night Shift menu’s “Sunset to Sunrise” option. This enables the MacBook’s sensors to check the amount of light in the surroundings. When it detects that the users’ surroundings are darker than usual, it will turn on, and when they return to bright or daytime conditions, it will turn off.
Remember that this option will activate automatically, which may be annoying if users are in an area with changing lighting. The screen may alternately turn on and off during the night if a tree or other objects were confusing the MacBook’s sensors. Users can temporarily disable the night shift if this applies to them.
Turning Off Blue Light on Mac Night Shift
The previously mentioned “color temperature” setting is useful in this case. To completely turn off the blue light on a Mac, follow the steps below:
- On the Mac, choose the Apple logo on the top left side of the menu
- Choose “System Preferences” from the drop-down list
- Choose “Displays”
- Choose the “Night Shift” panel
- Below “Color Temperature” drag the slider straight to the right
Keep in mind that this will make the display appear somewhat yellow. Users can adjust the color temperature to manage the amount of “blue” emitted by the monitor(s) and sliding it to the right will completely turn off all blue light.
Turning on Night Shift with Siri on Mac Device
To turn Night Shift on with Siri,
- Click on the Siri icon on the menu or simply speak “Hey Siri”.
- Ask Siri to switch on “Night Shift”.
- To disable it, users can request Siri to “turn off the Night Shift”
- That’s it! This is possibly the quickest technique though users can’t set a custom schedule with Siri.
Night Shift not working on the Mac? Fixing this problem!
Simply restarting is the first thing to attempt. Use one of the numerous approaches described above to deactivate Night Shift Mode (Siri is quick). Toggle this back on after being disabled to see whether the user’s issues have been resolved.
If not, restarting the Mac is the next step.
- Choose Restart after clicking the Apple symbol in the navigation bar.
- Try Night Shift again after the Mac is restarted.
- For the Mac to know when to switch Night Shift on or off based on the location when users are using a schedule like a sunset to sunrise, Location Services must be enabled.
- Click System Preferences Security & Privacy after selecting the Apple icon from the menu bar. Ensure Enable Location Services is preferred under Location Services.
The user’s issue should be resolved by one of these approaches. If it doesn’t, the problem is more specialized. Experts will try their best to discover a solution for users if users ask regarding this in the comments section below.
Climax: Better Eyes with Mac Night Shift!
Although it doesn’t completely remove the hazards to the eyes, macOS’ Night Shift function helps users shield their eyes from the blue light, which reduces eye strain and promotes better sleep. It would be wise to enable Night Shift on the iPhone if users use it to browse social media before going to bed. After all, damaging blue light is not solely produced by the Mac’s display.
