If you are reading this, then you would have got annoyed with the error pop-up “Active Directory Domain services currently not available” interrupting your work by stopping from taking a printout from your printer.
But! Don’t worry. You will be able to fix the error and resume your work in a few minutes. This article would help you by fixing this error. Make sure you go through completely to understand and implement solutions.
Fix 1: Reset Printer Spooler Settings
The spooler service is a software program that is responsible for managing all print jobs being sent to the computer printer. The print spooler service is usually visible to users so they can also cancel a print task which is currently being processed. It also allows them to manage tasks which are currently in the waitlist queue.
Try to restart this service and check if you get the error pop. Follow the below steps to restart Spooler:
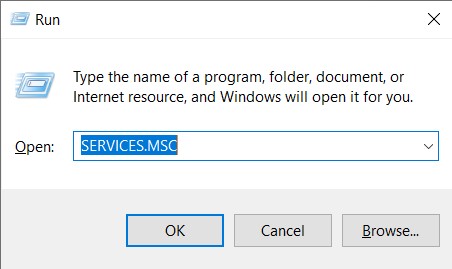
- Press Windows + R to launch Run application window. Type “services.msc” in the dialogue box and press Enter.
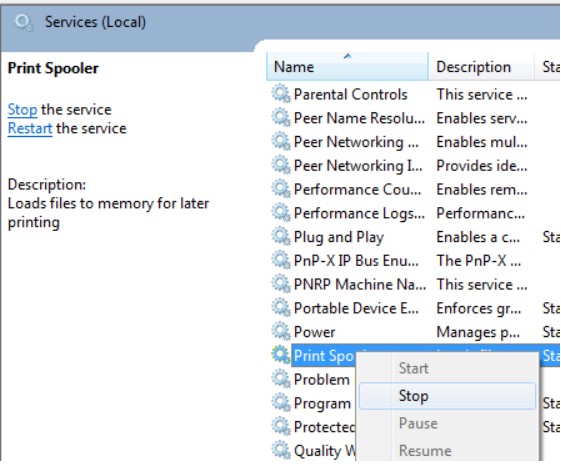
- Navigate to the service “Print Spooler”, which is present in the list of services. Right click on it to open properties. Click the “Stop” button present underneath system status and press “Ok” to save changes.
- Once disabled the service, we have to delete the printer files.
- Open this PC and Navigate to the following path
C:\Windows\System32\spool\PRINTERS
(You might need permission to access the following folder. If prompted, press Continue.)
- Open the folder and delete all the files in the PRINTERS folder and close the window.
- Again navigate back to the services tab and Start the “Printer Spooler” service. Also, make sure to keep the startup type as “Automatic”.
Now check if you still get the error. If the error still exists, try the below methods.
Fix 2: Grant access to Printer ports
Sometimes, you get this error due permission related issues when your account doesn’t have access to perform these actions. So, we can try changing the permissions of files in the registry editor.
- Press Windows + R to launch the Run application. Type “regedit” in the dialogue box and click on Enter.
- In the registry editor, navigate to the following file path:
HKEY_CURRENT_USER > Software > Microsoft > Windows NT > CurrentVersion
- Right click on “Devices” and select “Permissions.”
- Select your account from the list and click all checkboxes present under the column of “Allow.”
- Follow the same procedure for “PrinterPorts” and “Windows” present on the screen.
- Once done, restart your computer and check if you see the error.
- Try reinstalling the printer after implementing the above changes if the printer still doesn’t work.
Fix 3: Add Printer Manually and Update Drivers
If the above two methods don’t work for you, you can try connecting the printer again to your computer. Most times the printer is automatically detected and added to your PC when you connect with all the drivers being installed. But! sometimes, due to improper functioning of drivers, the targeted printer might not get added automatically. In such a case, we can try updating the drivers and adding the printer again.
Firstly, you need to remove the printer from your connected list of devices. Follow the below steps to do it.
- Press Windows + R to launch the Run application. Type “control panel” in the dialogue box and press Enter.
- In the control panel, select “Large icons” in the drop-down present at the top right side of the screen and select “Devices and Printers”.
- Identify your printer, right click it on and select “Remove device”. You will get a pop up asking you to confirm your actions as an administrator.
- On the same window, click “Add a printer” on the top of the screen. You would see a wizard which guides you on how to add your printer to your computer. Make sure that the printer is connected properly to your computer. If you are using the printer over a wireless network, try plugging it to your computer via an USB.
- Navigate to your manufacturer’s official website and download the latest drivers available to an accessible location.
- Press Windows + R, type “devmgmt.msc” and press Enter.
- Navigate to the subcategory of “Print queues”, expand it, select your printer, right click on it and click “Update Driver”.
- Select the second option “Browse my computer for driver software”.
- Navigate to the location where you downloaded the latest drivers for your printer. Select it and install it by pressing “Next”. Once the process is complete, restart your computer and check if the problem is solved.
Fix 4: Identify printer using Notepad
Another simple fix to this issue is to locate the printer using other applications. You can use NotePad to make the process simple as it would be present on almost every computer by default.
- Right-click on your Desktop, select New > Text Document.
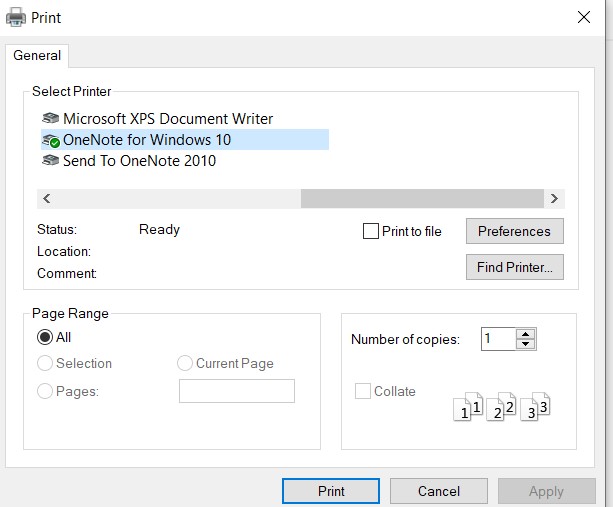
- Type anything in the blank space. Click File > Print.
You will see a pop up which shows all the printers currently installed on your computer. If you cannot find the targeted printer, click on “Find Printer” which is on the right side of the window. Now Windows will detect your printer and the problem will be solved.
Fix 5: Run Printer Troubleshooter
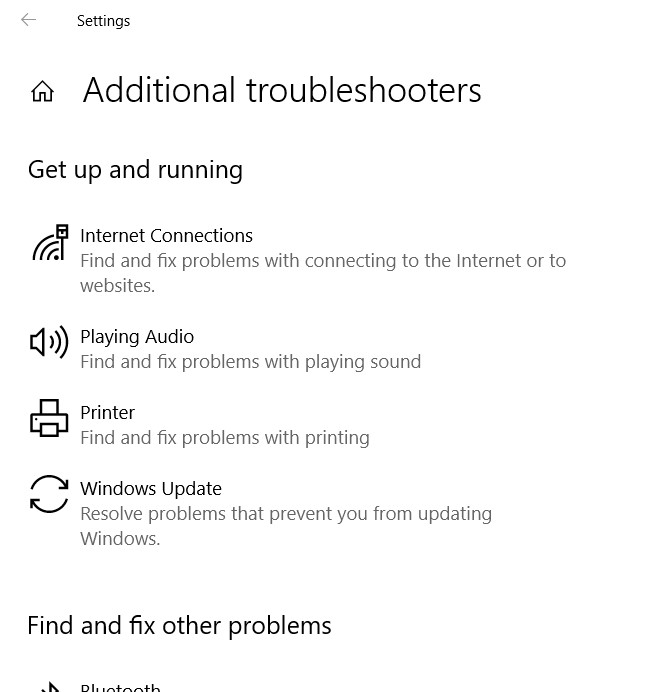
Sometimes, you can fix common printer problems with Printer troubleshooting which is included in Windows. You can use this troubleshooter for both wired and wireless printer; you can fix issues within moments on your computer by opening Troubleshooter by typing it in Windows search bar or you can open troubleshooter from settings, type Settings in search bar > System > Troubleshoot> additional troubleshooters > printer.
Bottom Line:
In most cases, this error pops up when the connection between your computer and printer is no longer valid. So, you would have re-establish a secure connection. This article covers all the potential fixes to solve the issue. If you find this article helpful, please do let us know in the comment section.


