GrabzIt is making scraping the web easier with its easy to use online web scraper tool. This tool is entirely web-based meaning that no complicated software needs to be downloaded and installed. But it still comes with all of the enterprise level features you could hope for such as IP rotation and using an actual web browser to mimic human behavior It is even able to scrape non-web page content such as PDF’s, JSON, RDF and more. The best part of all it is free to use with a regular free monthly allowance.
What can you use the web scraper for? There are lots of tasks that can be done automatically with our web scraper they include:
- Extracting data from websites like, product prices and more
- Converting websites to PDF, DOCX or image.
- Checking if Links or Images are broken
So how do you use it? Simple.
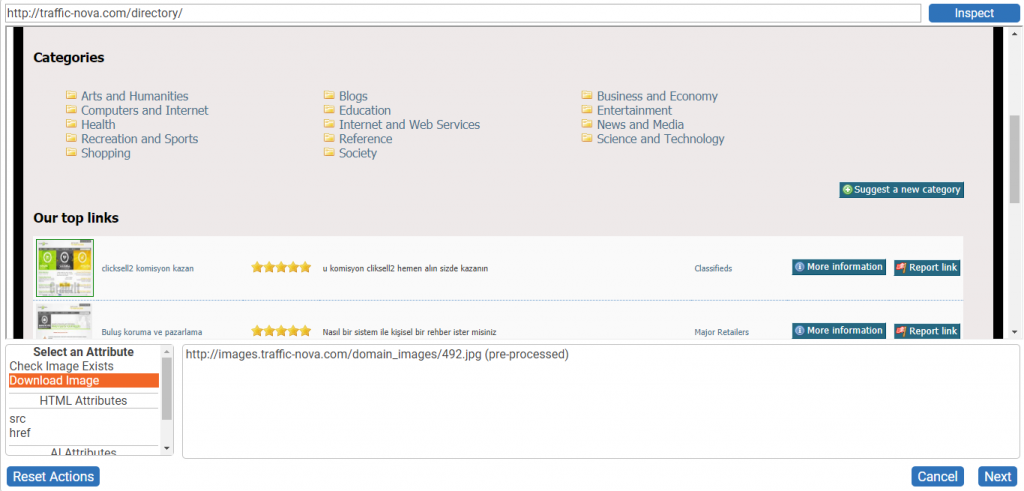
Just go to GrabzIt’s Web Scraper and click Start Web Scraping. Then enter the name of your web scrape. In this example, we are going to scrape a web directory: http://traffic-nova.com/directory/
To do this we need to enter http://traffic-nova.com/directory/ as the Target Website.
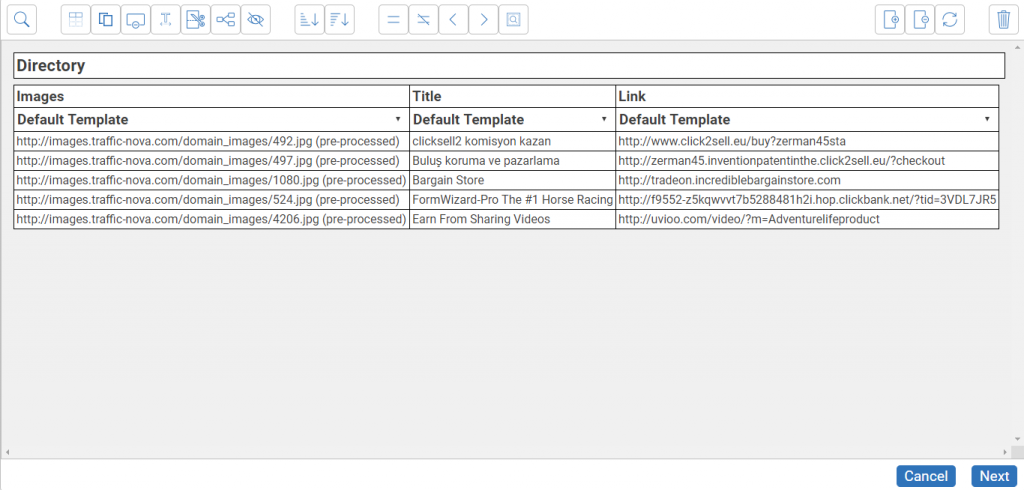
Then in the scrape instructions, we need to click Add New Scrape Instruction, when the website instructor opens choose the Extract Data action. Then click on the screenshots of the websites and click the Download Image attribute, followed by the Next button. You will then go to the dataset feature, which works pretty much like a spreadsheet, at this point you will then be asked what template this scrape instruction should be executed in. Just choose Default. Your image links will then appear in the dataset like a column in a spreadsheet. You can change the name of the dataset and columns just by clicking on the name and altering it. Then click on the Add Column button to add another column.
We will now do the same for the title and URL of each website. Just click on all the websites title and choose the Text attribute and then click Next. Then click Add Column.
Next click the title of all the websites again, but this time choose Link from the list of attributes and add it in the same way as for Title.
Finally, we need to tell the scraper how to navigate the website. To do this we are going to press Next to save the dataset. We are now going to go back to Add New Scrape Instruction. Click the Click Element action and then select all of the category names. Then click Next and Save, click No when it asks if you would like to extract content from the page now. Now go to Schedule Scrape tab and click Create.
Your scrape will now run and be automatically updated on the manage scrapes page with its progress. If you click on the icon you will be able to click on the viewer to see the latest screenshot of what the scraper is doing, along with the current logs. There is also the ability to download a snapshot of what the scrape is doing. If you find the web scrape isn’t scraping how you want you can press the Stop button to terminate it early and make any required changes, before starting it again.
If you think this is too complex for you, you can use one of our pre-made templates that handle a variety of common tasks. Just click on the name and then enter the Target Website and create the scrape like usual to get started.
